1. Go to 'Agreements & Offers>Allotments' here you will see a list of all active allotments.
To create a new allotment click 'New' at the top of the list.

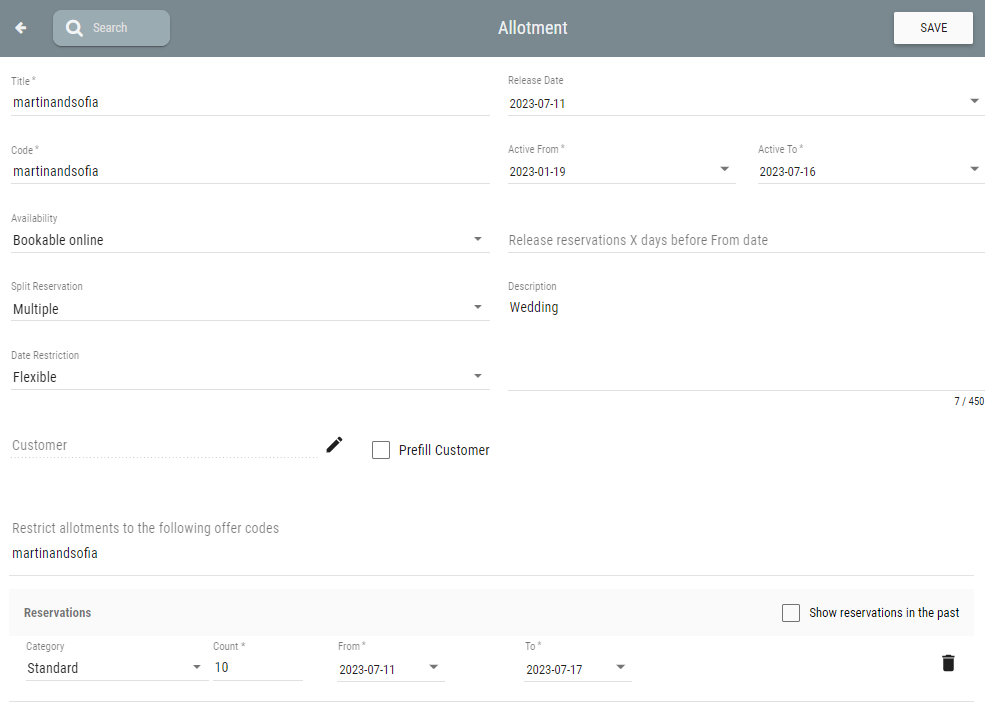
- Title: Required. Title of the allotment.
- Code: Required. The code that will be used online and in intranet when you want to pick rooms from the allotment.
- Availability: Required. Options: Not available (cannot be booked at all), Bookable online only, Not bookable online (bookable from intranet only) and Bookable online (bookable both in intranet and online).
- Split Reservation: Required. When you book from the allotment do you want all rooms to end up in a group reservation or become separate reservations?
- Date Restriction: Required. Should you be allowed to book for a part of the allotment time or do you have to book a room for the enitre period it is blocked for.
- Prefill Customer: Optional. If the customer info should be prefilled when the allotment code is used.
- Customer: Optional. Click the pen icon to add acustomer.
- Restrict allotments to the following codes: Optional. Here you list the codes that can be used with the allotment. If you want a discount to always be applied for the allotment create an offer with the same code as the allotment (e.g. in image below the allotment has code 'martinandsofia' and it has been linked to an offer with the same code).
- Release Date: Optional. When the allotment should release it's rooms so they can be booked without the allotment code.
- Active From: Required. Date when the allotment can be booked from.
- Active To: Required. Date when the allotment can be booked from.
- Release reservations X days before From date: Optional. The alltoment of the room will be removed the specified number of days before first allocated day of the room.
- Description: Optional. Internal description of the allotment.
3. Add the rooms you want to hold in this allotment.
4. To edit an already existing allotment go to 'Reservations>Allotments' here you will see a list of all active allotments.
Click the pen icon at the end of the row to enter the detailed view of the allotment.
Click 'EDIT' to be able to change fields in the allotment, or click the options menu (three dots in top right corner and select 'ALLOTMENT ON GRID' to edit the allotment in calendar view).


6. In 'Grid' the Allotment i marked with a striped transparent color.
If there is more then one allotment present these will get different colors. To see which allotment have which color click the eye icon in top right corner of the grid.
The allotment itself cannot be edited in the ordinary grid but reservations within the allotment can be.

Was this article helpful?
That’s Great!
Thank you for your feedback
Sorry! We couldn't be helpful
Thank you for your feedback
Feedback sent
We appreciate your effort and will try to fix the article